Starting your wood carving journey opens up a world of creativity. But if you’re new to the craft, safety must come first. This guide will walk you through the most important safety practices — from handling your tools correctly to wearing the right protective gear and setting up a secure workspace.
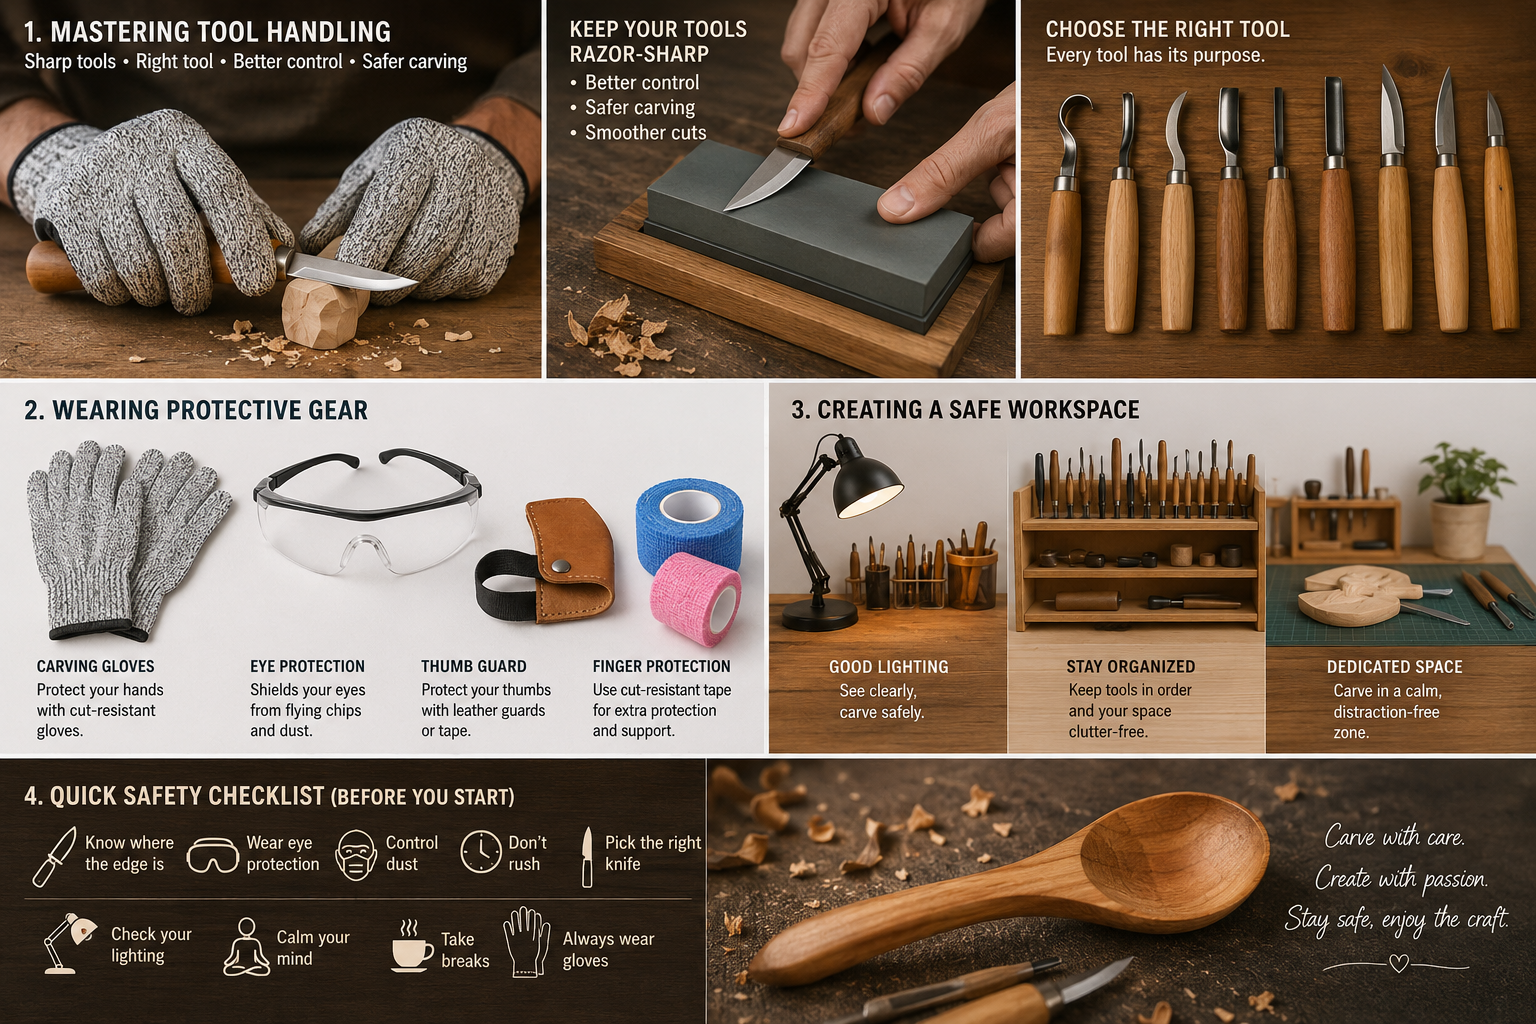
1. Mastering Tool Handling
Your carving tools are more than just equipment — they are an extension of your hands and imagination. To use them safely, you need to understand each tool’s unique features and best uses.
Choose the right tool for the job
Start with a basic set of carving tools, then expand as you gain experience. Every tool has its own purpose. You can learn more in our article: “Wood Carving Tools Your Toolkit Should Have.”
Consider the type of wood you’re working with (soft or hard) and how detailed your design is. Matching the tool to the task makes carving easier and safer.
Keep your tools razor‑sharp
Sharp tools give you better control and reduce the risk of accidents. Dull blades are dangerous — they slip more easily. Invest in a good sharpening kit and learn different sharpening methods. For step‑by‑step instructions, read our guide: “How to Sharpen Wood Carving Knives: Complete Sharpening Guide.”
Think of sharpening as a ritual that connects you with your tools. A well‑honed blade not only improves safety but also makes carving smoother and more enjoyable.
2. Wearing Protective Gear
Protecting yourself is a proactive part of the carving process. The right gear can prevent most common injuries.
Carving gloves
Your hands do the work, so guard them well. Look for gloves made of cut‑resistant materials. They should fit snugly — tight enough to protect, but not so tight that you lose feeling. A good glove balances safety with the sensitivity you need to control your tools.
Thumb protection
Your thumbs are especially vulnerable during detailed carving. Thumb guards shield them from accidental cuts and give you extra stability.
-
Leather thumb guards: Many carvers use a leather pad attached to an elastic band. Some cover the tip of the thumb, others leave it open — both work well.
-
Plasticized tape: You can wrap cut‑resistant tape around your thumb to make a custom guard. (Note: regular vet wrap tape is not cut‑resistant and should never be used for this purpose.)
-
Duct tape tricks: Some carvers make their own thumb guards from duct tape, or use duct tape to reinforce leather or rubber protectors.
3. Creating a Safe Workspace
A clean, well‑organized workspace is the foundation of safe carving. It lets you focus on your art without unnecessary risks.
-
Lighting: Make sure your work area is brightly lit so you can see every detail clearly. Poor light leads to mistakes and accidents.
-
Organization: Keep your tools in order. A clutter‑free space helps you stay focused and work efficiently.
-
Dedicated area: Set aside a specific spot for carving — away from distractions and potential hazards.
4. Quick Safety Checklist (Before You Start Each Session)
Before you make the first cut, run through this list:
-
Know where the edge is – Always be aware of your blade’s position.
-
Wear eye protection – Flying wood chips are common, especially when using knives and chisels.
-
Control dust – Use proper dust protection when sanding. Some woods can be toxic if you breathe in the dust.
-
Don’t rush – Work slowly and deliberately. Controlled movements are safer.
-
Pick the right knife – Match the knife to the task: sloyd knife, chip carving knife, detail knife, or spoon knife.
-
Check your lighting – Good light means better visibility and precision.
-
Calm your mind – Carve only when you feel relaxed and focused. Avoid carving when you’re angry, tired, or distracted.
-
Take breaks – Rest before you start, especially in fresh air. A tired carver makes mistakes.
-
Always wear gloves – Never carve without them. Think about what could go wrong and position your hands accordingly.
Final Thoughts
By following these safety guidelines, you’re not just protecting yourself — you’re building the habits that lead to a rewarding, long‑term carving practice. Respect your tools, put safety first, and let your creativity flow. Soon you’ll be turning raw wood into beautiful, handcrafted pieces with confidence and peace of mind.